Revision history timeline
The history timeline feature enables users to view document history and navigate through different revisions of a document. This guide explains how to implement and customize the timeline functionality in your Powerhouse application.
How to enable the timeline feature
To enable the timeline feature in your document editor, you need to set timelineEnabled: true in your editor module configuration:
// editors/to-do-list/index.ts
export const module: EditorModule<ToDoDocument> = {
  Component: Editor as unknown as FC<
    EditorProps<ToDoDocument> & Record<string, unknown>
  >,
  documentTypes: ["powerhouse/todo"],
};
This setting enables the timeline button in the document toolbar.
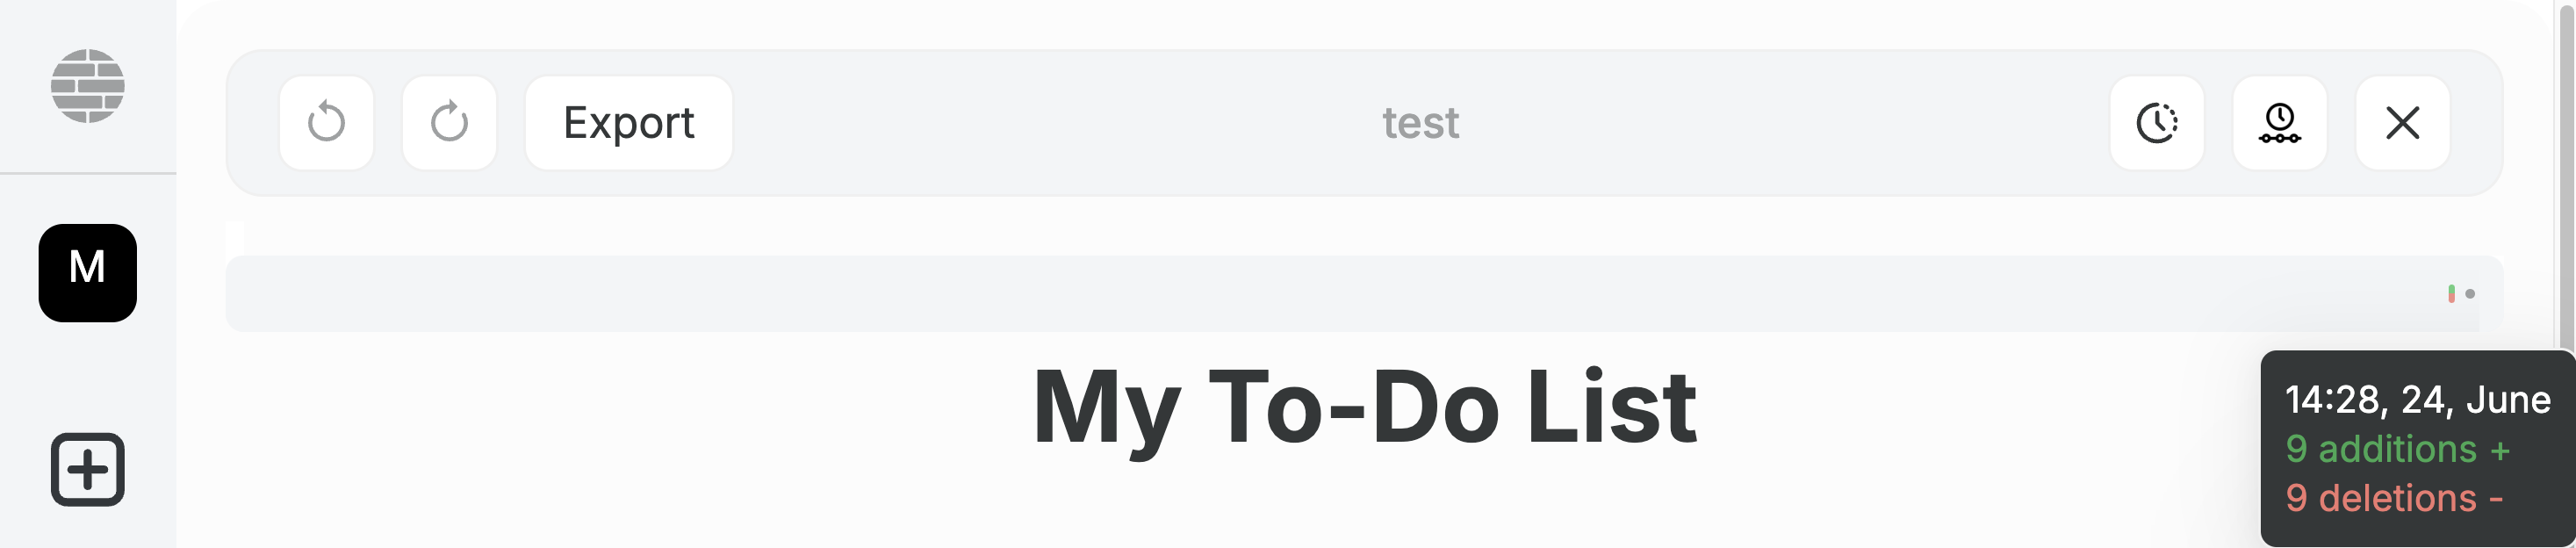
The revision history timeline will only become visible once your document model has some operations or 'history'. Add a few to-do's or some data in the model you are working on and the revision history timeline button in the Document Toolbar will be activated. Click the button to see the timeline expand and see the first history 'candle' appear.
How to implement the timeline feature
Default drive explorer
When using the default drive explorer with ph connect, the timeline functionality is handled automatically:
- Document analytics are collected and passed to the document toolbar
- The timeline button appears in the toolbar when enabled
- Users can click on timeline items to view document revisions
Custom drive explorer
For custom drive explorers, you need to handle timeline items fetching and user interaction manually. Here's how:
- First, import the necessary utilities from the Powerhouse common package:
import { useTimelineItems, getRevisionFromDate } from "@powerhousedao/common";
- Fetch timeline items using the
useTimelineItemshook:
// In your EditorContainer.tsx
const timelineItems = useTimelineItems(documentId);
- Track the selected timeline item in state:
const [selectedTimelineItem, setSelectedTimelineItem] =
  useState<TimelineItem | null>(null);
- Pass the timeline items to the DocumentToolbar and handle item selection:
<DocumentToolbar
  timelineButtonVisible={editorModule.config.timelineEnabled}
  timelineItems={timelineItems.data}
  onTimelineItemClick={setSelectedTimelineItem}
  // ... other props
/>
Note: The
timelineButtonVisibleprop should be set based on thetimelineEnabledsetting in the editor module's configuration. This ensures the timeline button is only shown when the feature is enabled for that specific document type.
- Pass the required context values to your editor component:
<EditorComponent
  context={{
    ...context,
    readMode: !!selectedTimelineItem,
    selectedTimelineRevision: getRevisionFromDate(
      selectedTimelineItem?.startDate,
      selectedTimelineItem?.endDate,
      document.operations.global,
    ),
  }}
  // ... other props
/>
Handling timeline revisions in document editor
In your document editor (e.g., editors/to-do-list/editor.tsx), you need to handle the timeline context props:
- Extract timeline-related properties from the context:
const {
  readMode = false,
  selectedTimelineRevision,
  getDocumentRevision,
} = context;
- Fetch the document at the selected revision when in read mode:
const [readModeDocument, setReadModeDocument] = useState<ToDoDocument | null>(
  null,
);

useEffect(() => {
  const getReadModeDocument = async () => {
    if (
      getDocumentRevision &&
      readMode &&
      typeof selectedTimelineRevision === "number"
    ) {
      const document = await getDocumentRevision({
        revisions: { global: selectedTimelineRevision },
      });
      setReadModeDocument(document);
    } else if (!readMode) {
      setReadModeDocument(null);
    }
  };
  getReadModeDocument();
}, [getDocumentRevision, readMode, selectedTimelineRevision]);

// Use the appropriate document based on mode
const document = readModeDocument || writeModeDocument;
- Adapt your UI to reflect read mode:
{readMode && (
  <div className="text-gray-500 text-md text-center">(🔒 Read Mode)</div>
)}

{!readMode && (
  // Edit controls here
)}
This implementation allows users to navigate through document history while preventing edits to historical revisions.