Implement Chatroom Editor
In this section you will implement the Chatroom document model editor. This means you will create a simple user interface for the Chatroom document model which will be used inside the Connect app to visualise our chatroom, send messages and emoji reactions.
Generate the editor template
Run below command to generate the editor template for the Chatroom document model. This command reads the Chatroom document model definition from the document-models folder and generates the editor template in the editors/chat-room/editor.tsx folder.
Notice the --editor flag which defines the chatroom document model editor. And the --document-types flag which defines the document type powerhouse/chatroom.
ph generate -- --editor ChatRoomEditor --document-types powerhouse/chat-room
Once complete, navigate to the editors/chat-room/editor.tsx file and open it in your editor.
As you'll see you will need to add more complex logic to make the chatroom functional and interact with our document model.
Add the necessary components for your editor first
Download the repository of the chatroom-demo as a zip file https://github.com/powerhouse-inc/chatroom-demo and navigate to .../chatroom-demo-main/editors/chat-room-editor to copy both the components folder & utils function. In this repository you will also find all of the other code snippets we've been using in this tutorial.
Drag the folder with react components & utils functions into your VSCode of your chat-room-editor.
In this folder you'll find:
- An avatar to be set for each chat room participant
- The chatroom environment itself
- A header for the chatroom
- The UI for rendering the message, username and reaction popup.
- The emoji reaction interface
- A UI for a text input field
The utils function will help you with mapping information from the document model to your chatroom components. Such as your emoji values to the relevant emoji to be displayed.
Now, let's copy & paste the code below into the editor.tsx file located at editors/chat-room-editorand save the file.
/* eslint-disable react/jsx-no-bind */
import { EditorProps } from "document-model/document";
import {
  ChatRoomState,
  ChatRoomAction,
  ChatRoomLocalState,
  ReactionType,
  actions,
} from "../../document-models/chat-room";
import { utils as documentModelUtils } from "document-model/document";
import { ChatRoom, ChatRoomProps, MessageProps } from "./components";
import { reactionKeyToReactionType, mapReactions } from "./utils";

export type IProps = EditorProps<
  ChatRoomState,
  ChatRoomAction,
  ChatRoomLocalState
>;

export default function Editor(props: IProps) {
  const disableChatRoom = !props.context.user;          // we're disabling the chatroom when a user is not logged in.

  const messages: ChatRoomProps["messages"] =
    props.document.state.global.messages.map((message) => ({    // this object comes from the document state with a mapping that validates which message which user has send.
      id: message.id,
      message: message.content || "",
      timestamp: message.sentAt,
      userName: message.sender.name || message.sender.id,
      imgUrl: message.sender.avatarUrl || undefined,        // if the user has an avatar set we'll use it.
      isCurrentUser: message.sender.id === props.context.user?.address,
      reactions: mapReactions(message.reactions),
    }));

  const onSendMessage: ChatRoomProps["onSendMessage"] = (message) => {
    if (!message) {
      return;
    }

    props.dispatch(
      actions.addMessage({
        messageId: documentModelUtils.hashKey(),
        content: message,
        sender: {
          id: props.context.user?.address || "anon-user",
          name: props.context.user?.ens?.name || null,  // The context of the editor allows us to get hold of the users profile information.
          avatarUrl: props.context.user?.ens?.avatarUrl || null,
        },
        sentAt: new Date().toISOString(),
      }),
    );
  };

  const addReaction = (
    messageId: string,
    userId: string,
    reactionType: ReactionType,
  ) => {
    props.dispatch(
      actions.addEmojiReaction({
        messageId,
        reactedBy: userId,
        type: reactionType,
      }),
    );
  };

  const removeReaction = (
    messageId: string,
    userId: string,
    reactionType: ReactionType,
  ) => {
    props.dispatch(
      actions.removeEmojiReaction({
        messageId,
        senderId: userId,
        type: reactionType,
      }),
    );
  };

  const onClickReaction: MessageProps["onClickReaction"] = (reaction) => {      // This allows us to increase the reactions on a emoji that already has been used as a reaction to a message.
    const message = messages.find(
      (message) => message.id === reaction.messageId,
    );

    if (!message) {
      return;
    }

    const messageId = reaction.messageId;
    const reactionType = reactionKeyToReactionType(reaction.type);
    const currentUserId = props.context.user?.address || "anon-user";

    const existingReaction = message.reactions?.find(
      (r) => r.type === reaction.type,
    );

    if (existingReaction) {
      const dispatchAction = existingReaction.reactedBy.includes(currentUserId)
        ? removeReaction
        : addReaction;

      dispatchAction(messageId, currentUserId, reactionType);
    } else {
      addReaction(messageId, currentUserId, reactionType);
    }
  };

  const onSubmitTitle: ChatRoomProps["onSubmitTitle"] = (title) => {
    props.dispatch(actions.editChatName({ name: title }));
  };

  const onSubmitDescription: ChatRoomProps["onSubmitDescription"] = (
    description,
  ) => {
    props.dispatch(actions.editChatDescription({ description }));
  };

  return (
    <div
      style={{
        height: "calc(100vh - 140px)",
      }}
    >
      <ChatRoom
        description={
          props.document.state.global.description || "This is a chat room demo"
        }
        disabled={disableChatRoom}      // we're disabling the chatroom when a user is not logged in.
        messages={messages}             // the list of messages users are submitting
        onClickReaction={onClickReaction}
        onSendMessage={onSendMessage}
        onSubmitDescription={onSubmitDescription}
        onSubmitTitle={onSubmitTitle}
        title={props.document.state.global.name || "Chat Room Demo"}
      />
    </div>
  );
Now you can run the Connect app and see the Chatroom editor in action.
ph connect
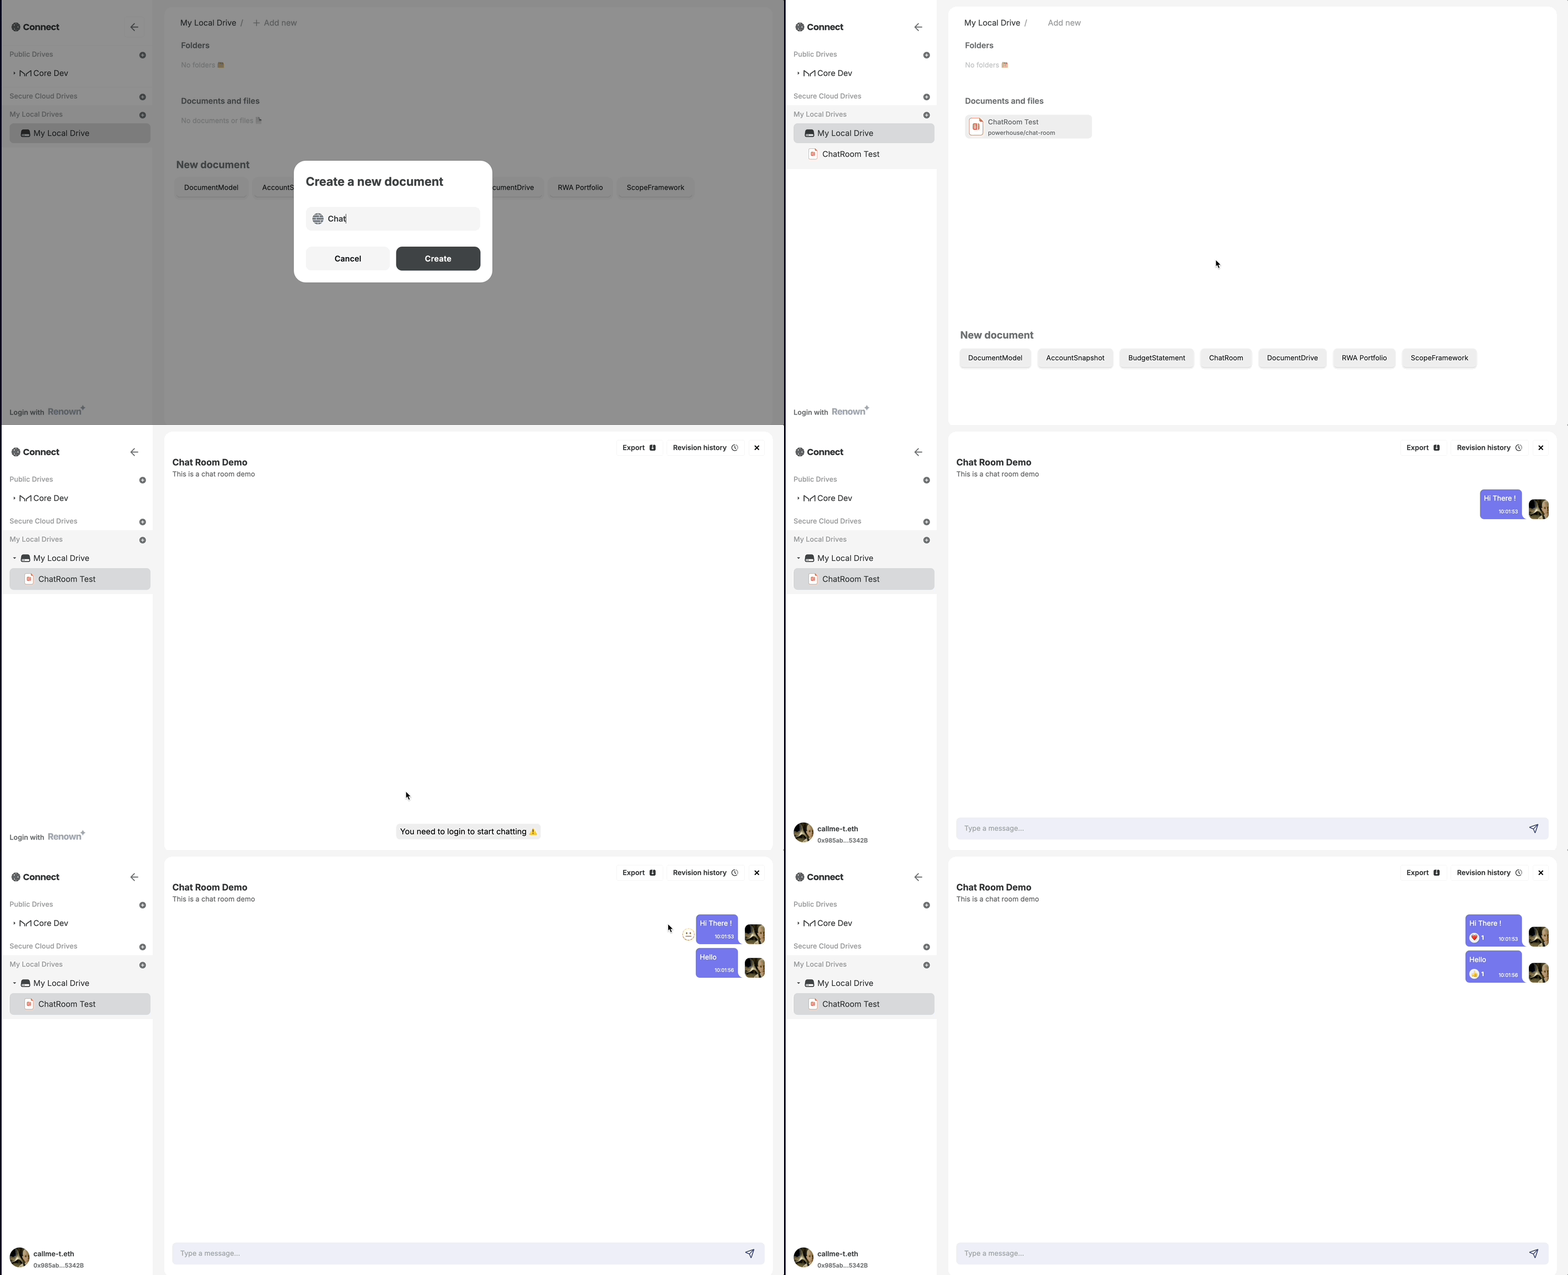
In connect, in the bottom right corner you'll find a new Document Model that you can create: ChatRoom. Click on it to create a new Chat Room document. A warning will prompt you to login before you are able to send messages.
Login with an ethereum address via Renown to start sending messages.
Below GIF shows the Chatroom editor in action.

If you managed to follow this tutorial until this point, you have successfully implemented the ChatRoom document model with its reducer operations and editor.