Using the API
Introduction to Switchboard
Switchboard is the API interface that enables developers and data engineers to access data captured through document models in Connect and Fusion.
Once you've structured and captured data from your business processes, Switchboard allows you to leverage that data to build insightful experiences in external websites, create interactive drive widgets, or generate detailed reports and dashboards in Fusion.
Since your document models are defined with a GraphQL schema, you can use the same objects and fields in your queries and mutations to retrieve or write data from and to your documents.
Querying a document with the GraphQL API
Starting the reactor locally
In this tutorial, we'll show how to use a GraphQL query to query a document model. We'll continue with the To-do List example from our introduction tutorial, but the process can be applied to any other document model. To make our document model available in the Apollo Studio Sandbox, we'll need to store it on a remote Reactor.
Powerhouse Reactors are the nodes in the network that store documents, resolve conflicts, and rerun operations to verify document event histories. Reactors can be configured for local storage, centralized cloud storage, or a decentralized storage network.
Just as you can run Connect locally in studio mode, you can also run a Reactor locally. Use the following command in the terminal from within your Powerhouse project directory:
ph reactor
To start both Connect and a Reactor locally at the same time in a Powerhouse project, you can use the following command:
ph dev
This will return a URL to access the Reactor.
[Reactor]: ➜ Reactor: http://localhost:4001/d/powerhouse
Adding a remote drive or Reactor to Connect
If the remote drive or Reactor isn't present yet in Connect, you can add it by clicking the (+) 'Create New Drive' button in the Connect drive navigation and using the localhost URL to add a new drive with its underlying reactor. Usually, this is http://localhost:4001/d/powerhouse.
Get access to an organization's drive instances by adding their drive to your Connect Drive navigation tree view with the help of the correct drive URL. Click the (+) 'Create New Drive' to add a public drive. To add a new drive, you'll have to know the correct public URL of the drive. Read more about configuring drives.
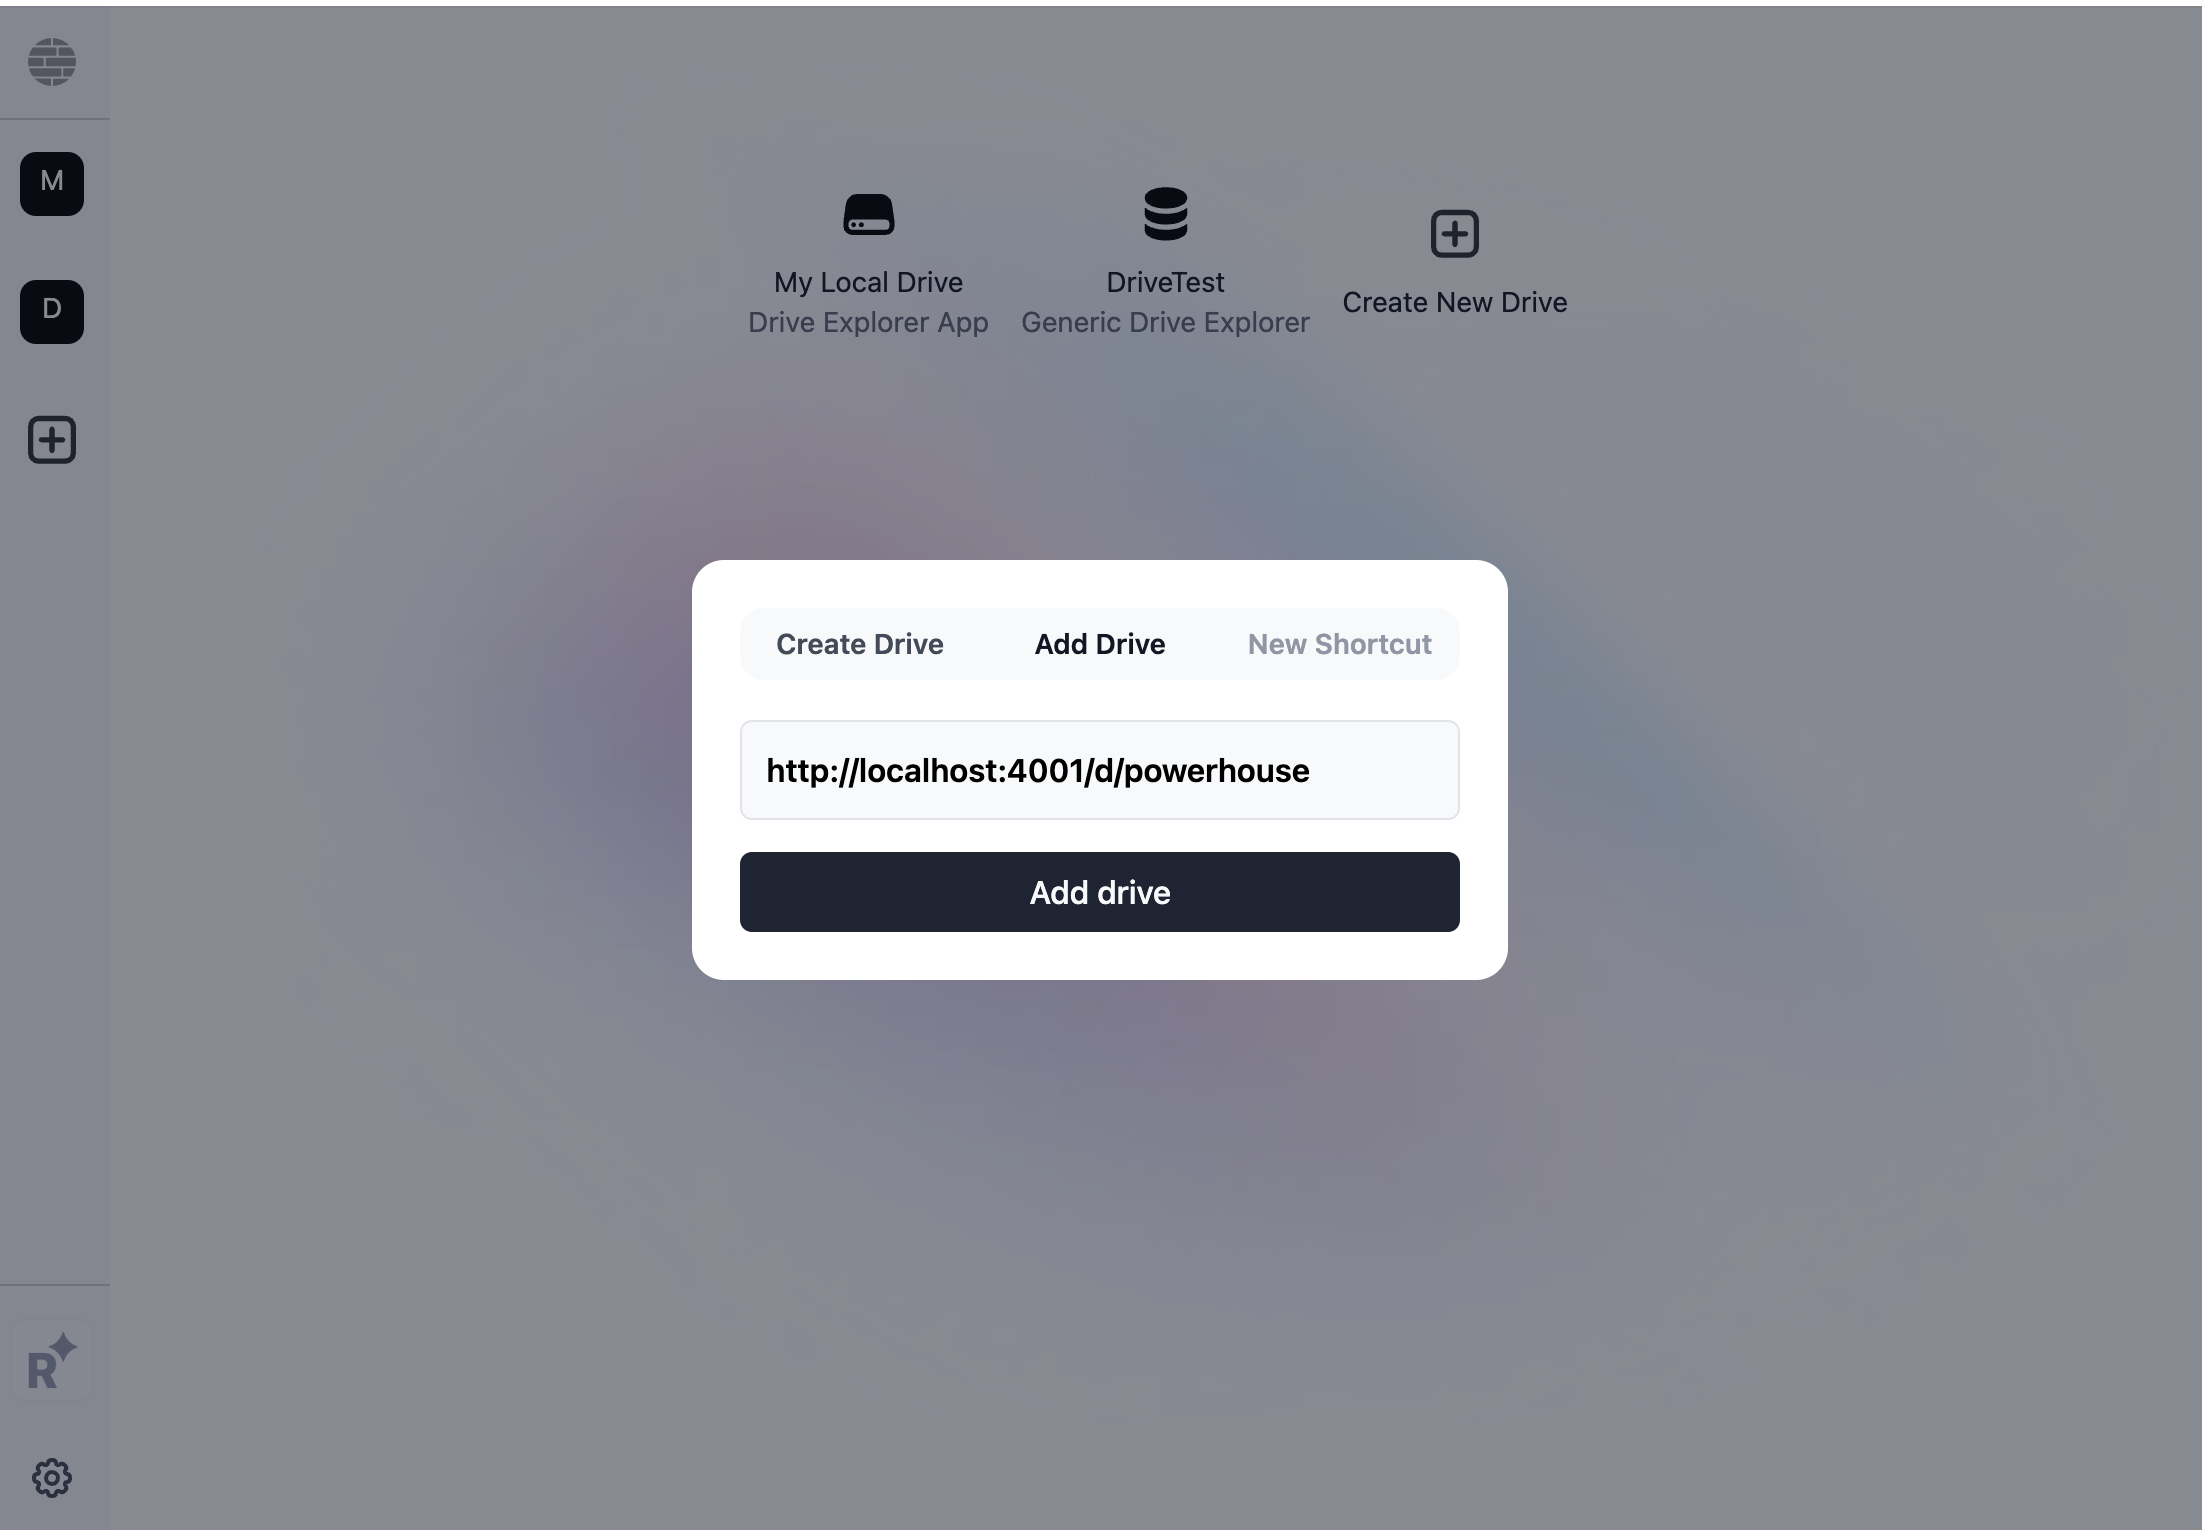
The 'Add Drive' button that allows you to enter a Drive URL.
Query the state of a document
Now that we have our remote reactor and/or drive running, we can store our document model on it. Let's quickly create a new to-do list document in Connect Studio to test the process. Let's call it 'Powerhouse-onboarding-tasks'.
Add the following to-dos to your list:
- Sign up for Powerhouse
- Do the work
- Deliver the work
- Send the invoice
- Get paid
Below is the operation history of the to-do list document. As you can see, the operations are logged in the order they were executed.
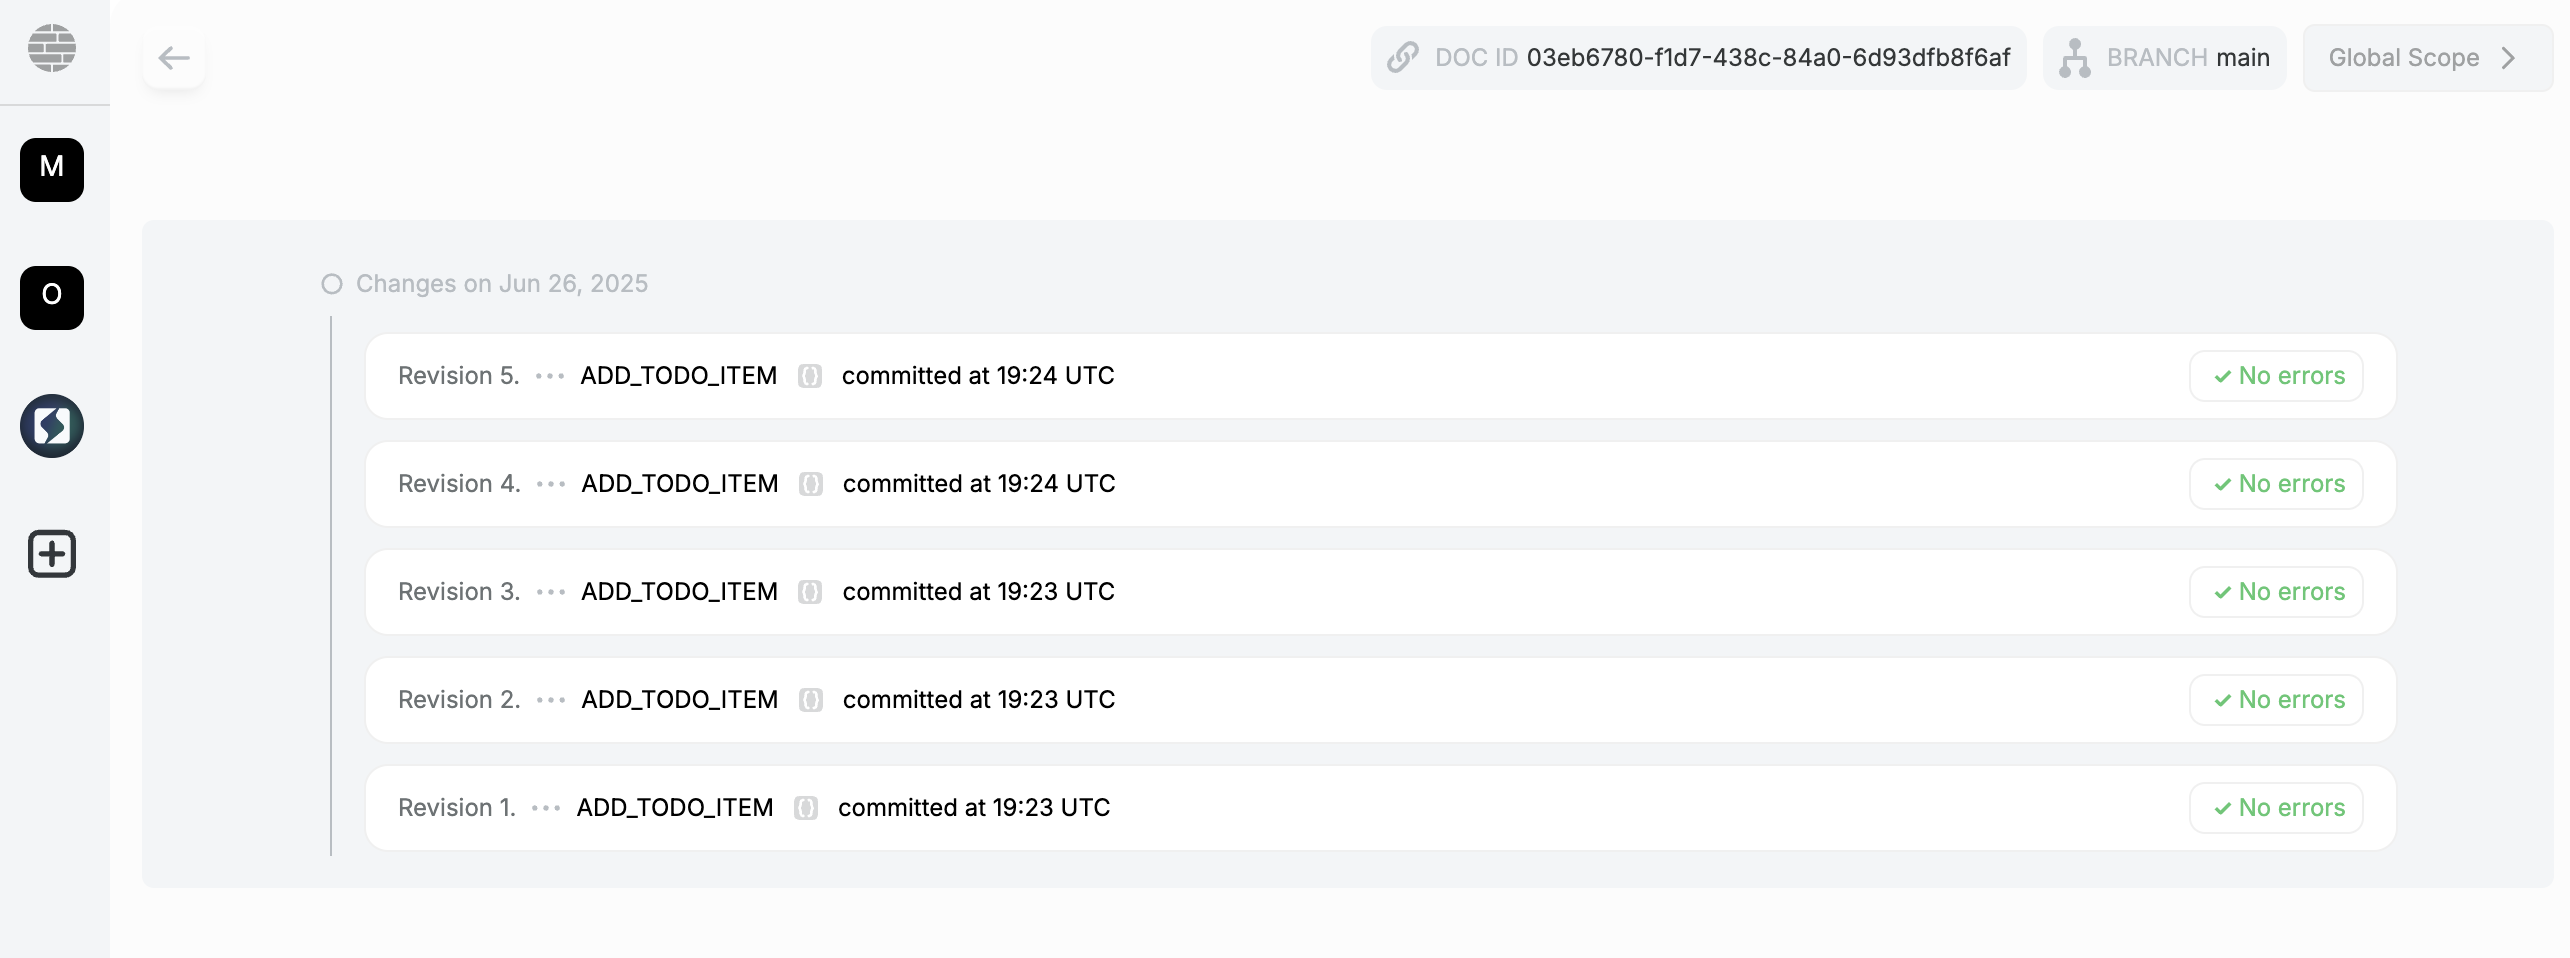
The operation history of the to-do list document, showing each change made.
Now that we have some data in our document model, we can query it through the GraphQL API.
Option 1: Query your document via the Switchboard API Button.
Whenever you want to start a query from a document within Connect, you can open Switchboard by clicking the Switchboard icon in the top right-hand corner of the document editor interface. The Switchboard API button at the top of your document model will get you the complete state of your current document. This will prepopulate the Apollo Studio Sandbox with the correct DocumentID for your document model.

The Switchboard button provides a direct link to the GraphQL API for the document.
Option 2: Query your document by document ID
In your Document Toolbar, you will find an icon to visit your operations history. At the top of the toolbar, you will find your document ID. Copy this ID to use it in the Switchboard API.

You can copy your Document ID from your operations history.
When you navigate to your Switchboard endpoint by adding /graphql/system to the end of your URL. (e.g., http://localhost:4001/graphql/system, https://switchboard.phd/graphql/system, or add it to a custom domain), you can use this document ID to query the state of your document.
The documentation on the left-hand side of the Apollo Sandbox will show you all the different fields that are available to query.
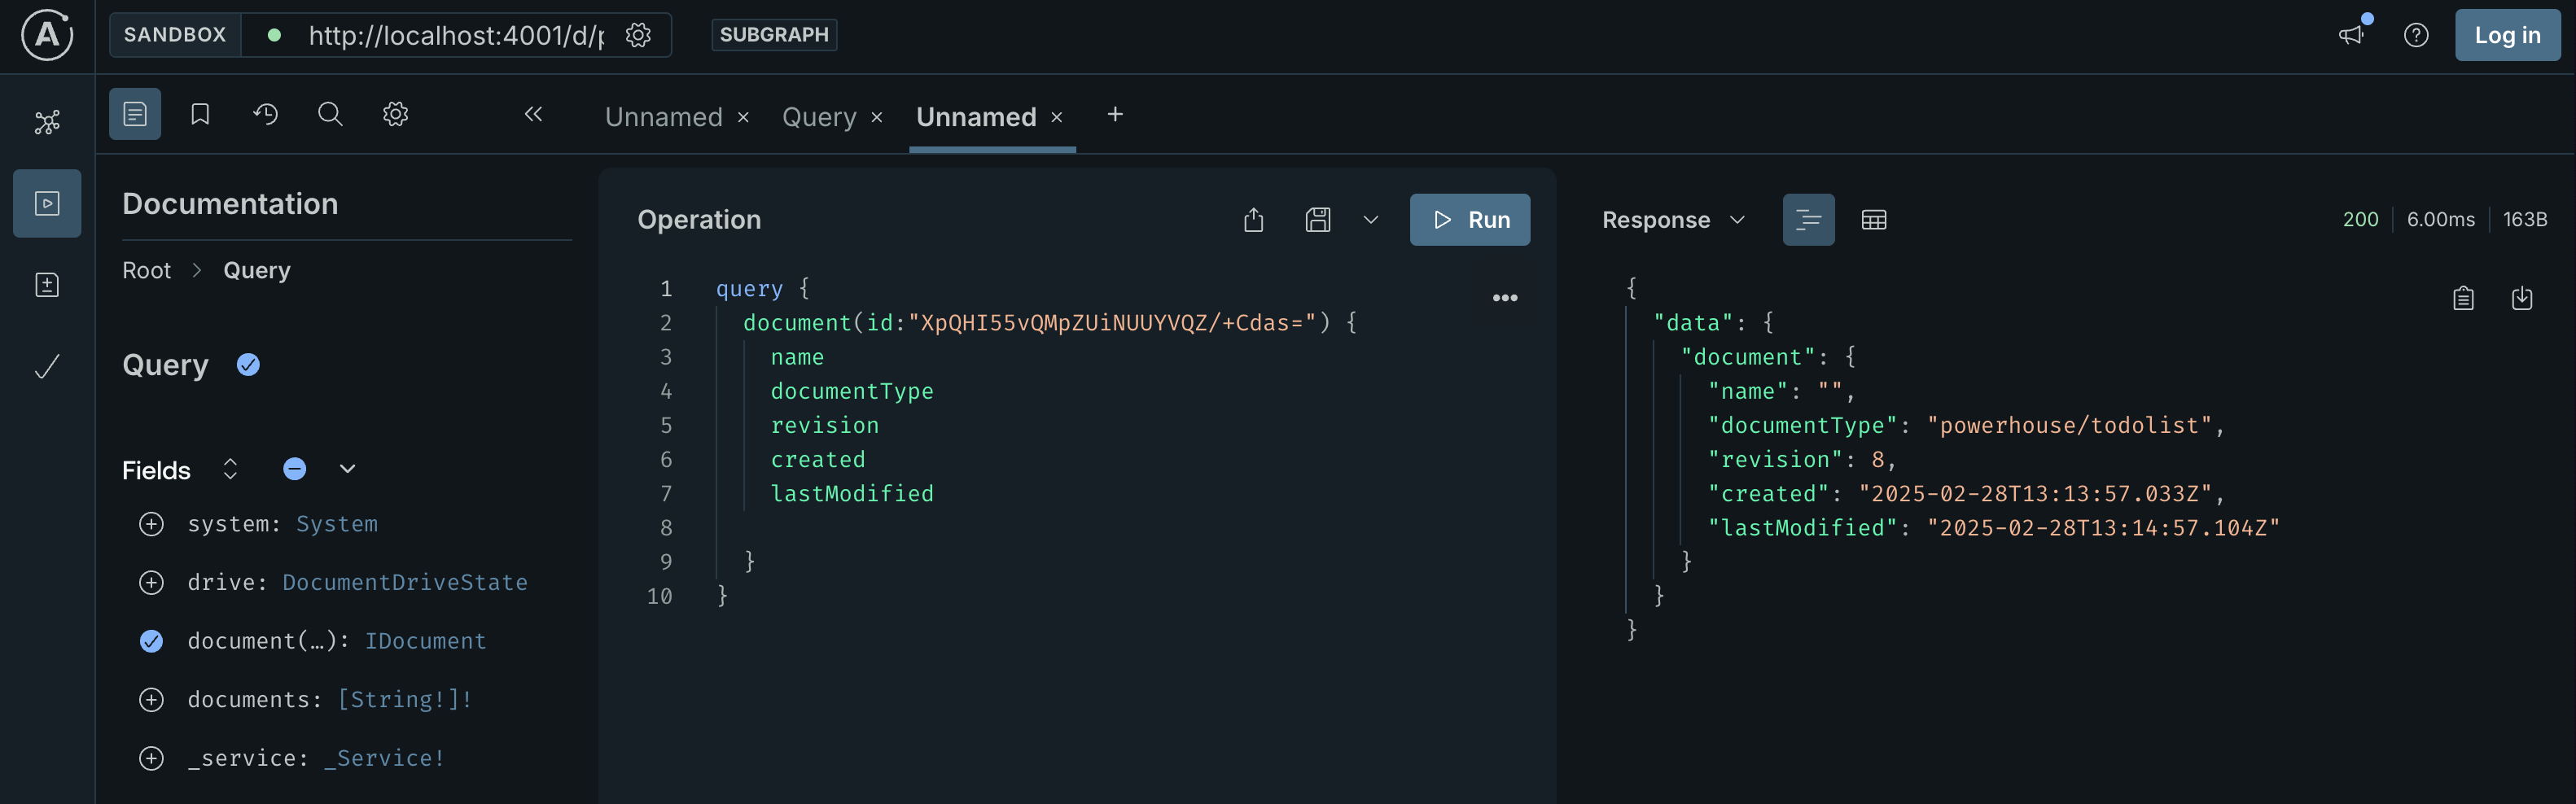
The Apollo Studio Sandbox showing the available fields for querying a document.
Option 3: Search for your document ID via GraphQL
Alternatively, we can use our Reactor URL and endpoint to figure out the document ID. e.g., http://localhost:4001/graphql/system, https://switchboard.phd/graphql/system or your custom https://switchboard.domain/graphql/system
We can find out the ID of our document by querying the drive for its documents. Since we only have one document in our drive, this query will return the ID of our to-do list document.
query Query {
  ToDoList {
    getDocuments {
      id
      name
      documentType
      revision
      created
      lastModified
    }
  }
}
This example query is structured to request all documents of type ToDoList from the drive.
It extracts common metadata fields such as id, name, documentType, revision, created, and lastModified.
Get the state of the document
Once you've found your document via any of the three options above, you'll be able to query its state.
In the previous step, we queried for document metadata. Now let's query for the actual content of the document state.
query getDocument($documentId: PHID!, $driveId: String) {
  ToDoList {
    getDocument(docId: $documentId, driveId: $driveId) {
      id
      created
      lastModified
      name
      revision
      state {
        items {
          id
          text
          checked
        }
        stats {
          total
          checked
          unchecked
        }
      }
    }
  }
}
{
  "documentId": "03eb6780-f1d7-438c-84a0-6d93dfb8f6af", // or replace this with your specific doc ID
  "driveId": "powerhouse" // or replace this with your specific driveId
}
This query will return the current state of the document, including all to-do items and stats.
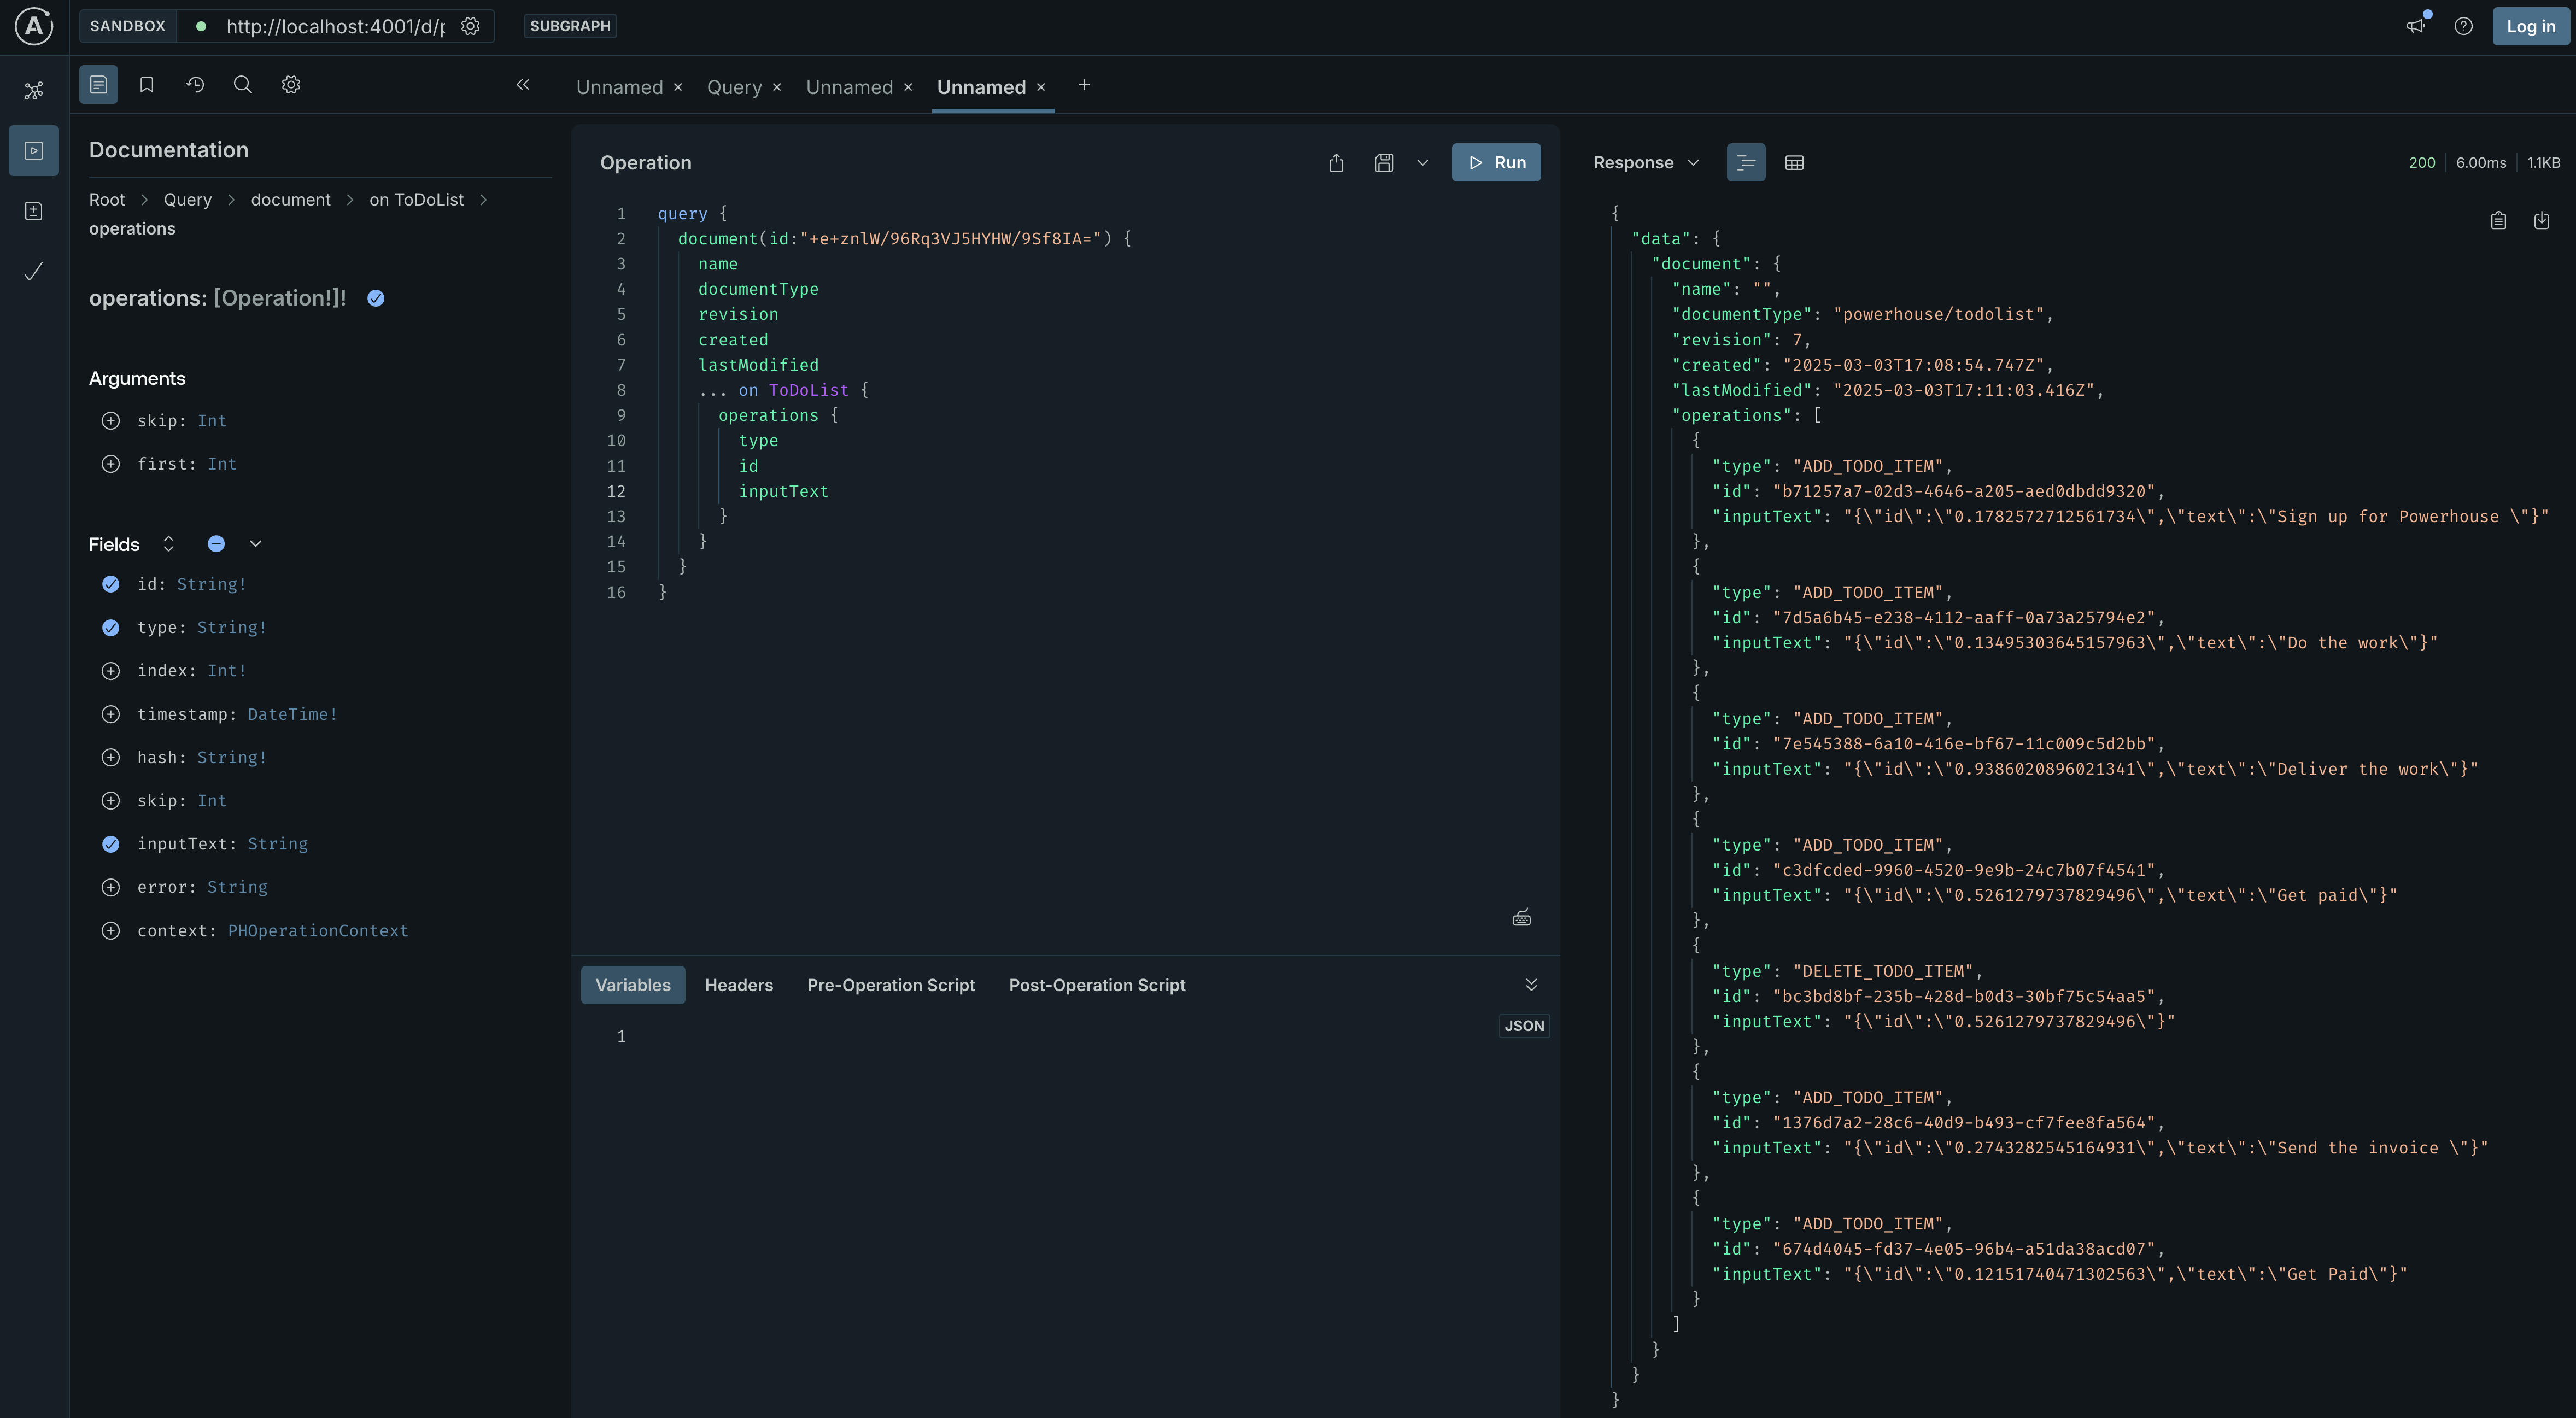
The Apollo Studio Sandbox showing the addTodoItem mutation. You
can see the variables passed in and the response from the server.
Mutate the state of a document
Now that we know how to query the state of a document, we can start to write to it.
To perform write operations, we use GraphQL Mutations. Mutations are similar to queries, but they are used to create, update, or delete data. For our To-do List, we'll want to add, check, and remove items.
Adding a new to-do item
Let's start by adding a new item to our list. The document model for our to-do list has an ADD_TODO_ITEM operation, which translates to an addTodoItem mutation in GraphQL.
To use this mutation, you need to provide the docId of the to-do list you want to modify, and the text and id for the new to-do item. We'll specify these via variables.
Here is an example of how to structure the mutation:
mutation Mutation($docId: PHID, $input: ToDoList_AddTodoItemInput) {
  ToDoList_addTodoItem(docId: $docId, input: $input)
}
{
  "docId": "03eb6780-f1d7-438c-84a0-6d93dfb8f6af",
  "input": {
    "text": "My new to-do from GraphQL",
    "id": "1"
  }
}
Replace the example docId with the actual ID of your document. You can get this ID by querying the drive as we did before.
When you execute this mutation in Apollo Studio, it will add the new item to your to-do list. The response will return the number of to-do's on your list.
Deleting a to-do item
To delete an item, you'll need its unique identifier. When you query for the to-do items in your list, each one will have an id. You'll use this id to specify which item to delete.
The document model provides a DELETE_TODO_ITEM operation, which corresponds to a deleteTodoItem mutation.
Here's how you can use it:
mutation Mutation($docId: PHID, $input: ToDoList_DeleteTodoItemInput) {
  ToDoList_deleteTodoItem(docId: $docId, input: $input)
}
{
  "docId": "03eb6780-f1d7-438c-84a0-6d93dfb8f6af",
  "input": {
    "id": "0.6325811781889789"
  }
}
Make sure to replace the docId and id with the appropriate values for your document and the item you wish to delete.
After executing this mutation, the specified to-do item will be removed from your list.
Verifying the changes
After performing a write mutation, you can verify that the change was successful in a couple of ways:
- Query the document state again: Rerun the
getDocumentquery from earlier in this tutorial. You should see the new item in the list or the deleted item removed. - Check the Operation History: The operation history in Connect will show the new
ADD_TODO_ITEMorDELETE_TODO_ITEMoperation, along with who performed it and when. This provides a complete audit trail of all changes to the document.
Summary
This ability to programmatically read from and write to documents via the GraphQL API is a powerful feature of Powerhouse. It unlocks countless possibilities for integrating your structured data into other applications, building automated workflows, and creating rich, data-driven user experiences.